
How to add and position multiple barcodes using Zapier
Modern documentation management systems and their related business cannot sustain anymore without a barcoding feature in place. Barcoding is indeed a brilliant technological progression, the world has made in the area of data and information transfer. This is done in a secure and confidential manner through documents that are in digital formats like PDF and Word. With a little human effort and a good instrument to read the encrypted data, that are stored in such small indecipherable formats (optical character recognition tools), wonders of automation can be brought into effect.
Now, what is a barcode ? A barcode is a series of lines, blocks, or dots displayed on a screen or a paper that carry encrypted data. These are read by a scanning device and fed into a system for further processing. There are various types of barcodes available, each one created to cater to a certain purpose. A few examples of barcodes are Code 128/Code 39(the first type of barcode), QR Code, Datamatrix, EAN, etc. Please refer to the blog of PDF4me to get more information and try various options of barcoding with the PDF4me account.
At PDF4me, we provide the following barcodes for your ease of use, namely Code 128, QR Code, Datamatrix, Aztec, and Pdf417.
Why do we need several types of barcodes?
Several types of barcodes are available for creating various formats of data. All these data are encrypted in a specific manner. This encryption of data shall depend on the information and the type of document in use. For each purpose, we might have to rely on a particular type of barcode.
In this blog, we shall guide you, on how we can include multiple barcodes in a document and position it for your better use. Adding multiple barcodes in the same document, needless to say, requires exchange of data in a secure and concise manner with information encapsulated. Each barcode might carry data relevant to a particular function, department, or module of an enterprise. The array of data is therefore stored according to the usage and the type of barcode is also decided accordingly.
Take, for instance, adding two types of barcodes to the document with Code128 and QR code. Code 128 is a linear barcode or 1D barcode that consists of a simple set of lines. In this case, the width of every line corresponds to a particular character. Nevertheless, it is recommended that we restrict the length of text with around 20 characters (with limited character set). Although it is possible to create barcodes of greater text length, it is preferred for shorter text length for better readability covering a large area. In this example, we will use the barcode to store the ‘current date’.
QR Code is a two-dimensional barcode which has an array of smaller square blocks. These small blocks represent bits of data that are encrypted. A QR code can store huge data with text around 2000 characters in length for a precise readability. If the data text length exceeds 2000 characters, the scanning device would not recognize the information stored. The size of QR Code block, also called as module, can vary with the size of data. Primarily we use QR code to store the important document-metadata.

How to add these two barcodes in the document?
You may be wanting categories of information, the document must carry, and may wish to use them for various purposes. In an order-processing firm, for example, you might like to move different sets of data to various modules/functions of the firm. You may probably want them stored in a related database in the backend. These data may be captured in multiple formats using different types of barcodes. A barcode scanner reads the data and feeds the details appropriately to the system. In this example, using Code 128 and QR code, we shall see how to add barcodes systematically in the document.
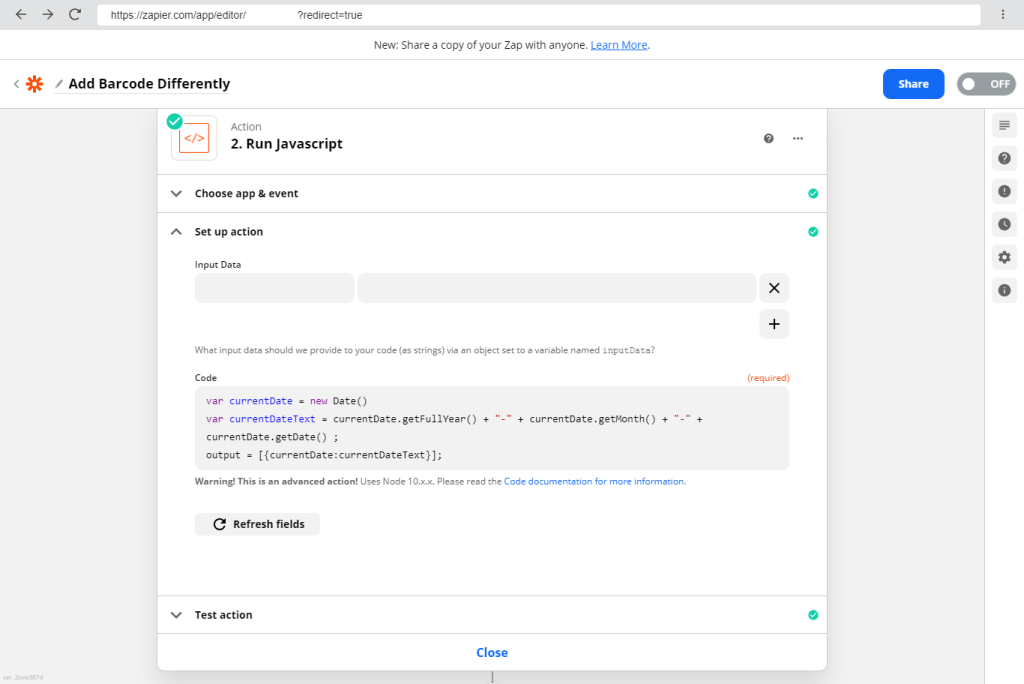
To add the first barcode of type Code128 with the current date, we need to generate the data ‘current date’. In a Zapier platform, we can effortlessly use the Code by Zapier{target=_blank}{rel=“noopener nofollow”} integration provided by Zapier. You also have a choice of using two languages supported for this purpose – JavaScript and Python. However, you may also have to take care of the fact that only one language be used at a time, in a single step. Screenshot of this step is attached below.
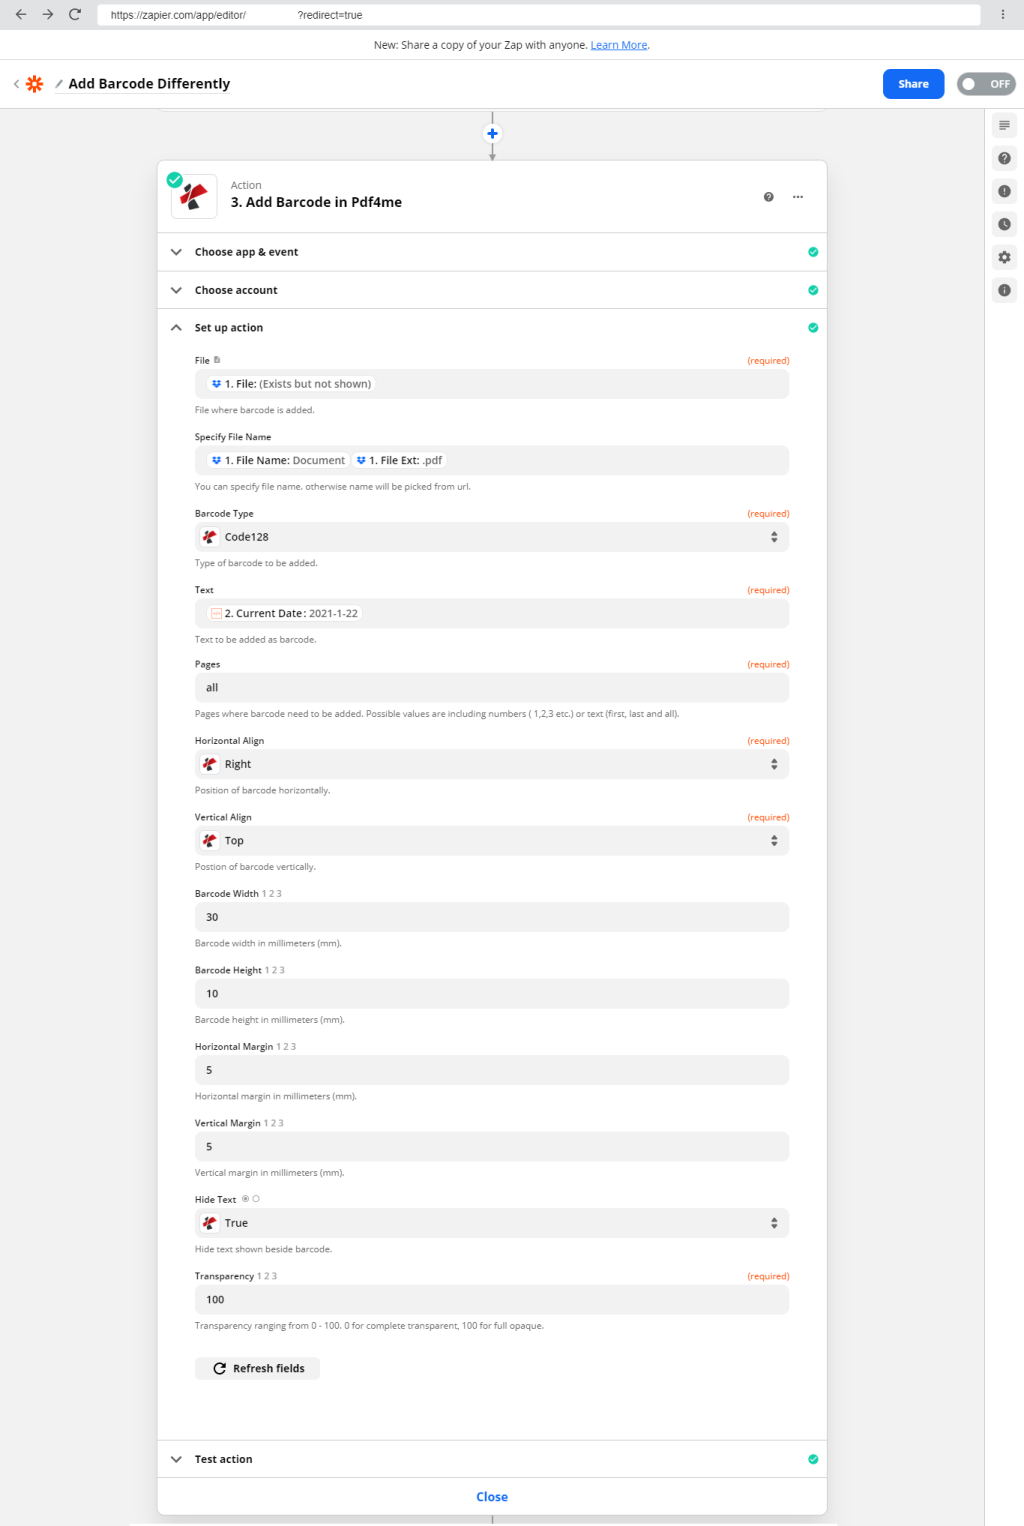
After we generate the text successfully, it’s time to add Pdf4me and select the Add Barcode to PDF action. For this, select your Pdf4me account and then configure the settings accordingly. We then can pass the Current Date text as a parameter to the Text field.
Now you may be wondering where to place the barcode in your document. The positioning of the barcode is also vital for a convenient and error-free scanning activity. The ease of using scanners or smartphones has a role to play in positioning the barcodes. Equally important is to restrain the overlap of two barcodes. In this particular case, where we use Code128 barcode, we have chosen to align it to the top right corner of the page with a small margin from the edges. About 5 mm margin from the top-right edge is what you can see in the example. All measurements are calculated and expressed in millimeters. You may refer to the config values below in the screenshots.
You can further explore the settings, by going through our documentation on this topic.
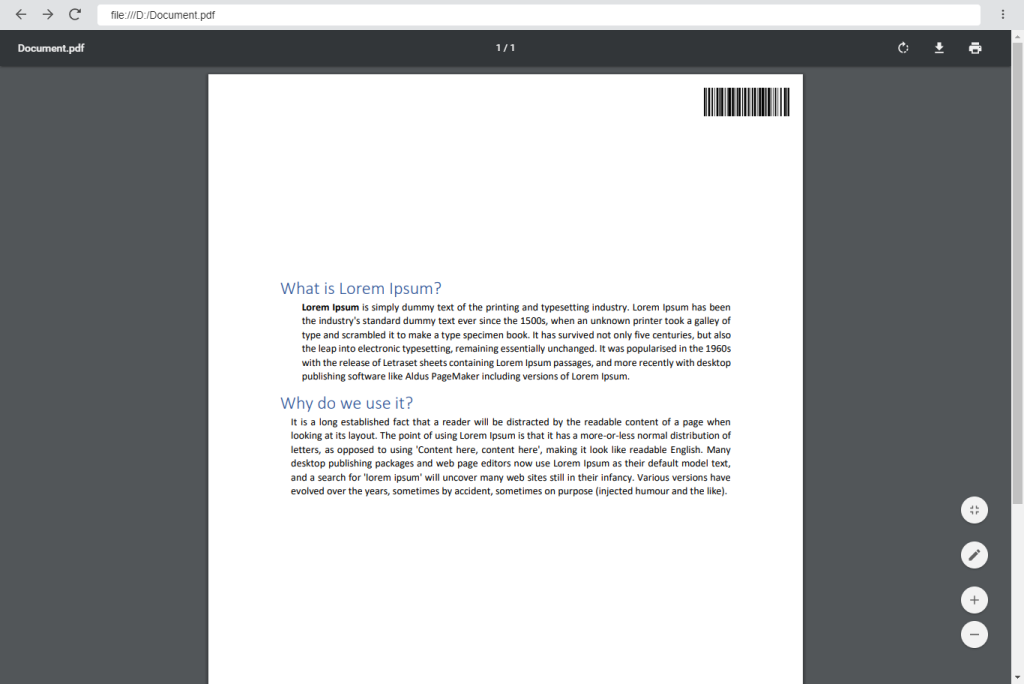
After adding the first barcode, the document would look like the sample shown below.
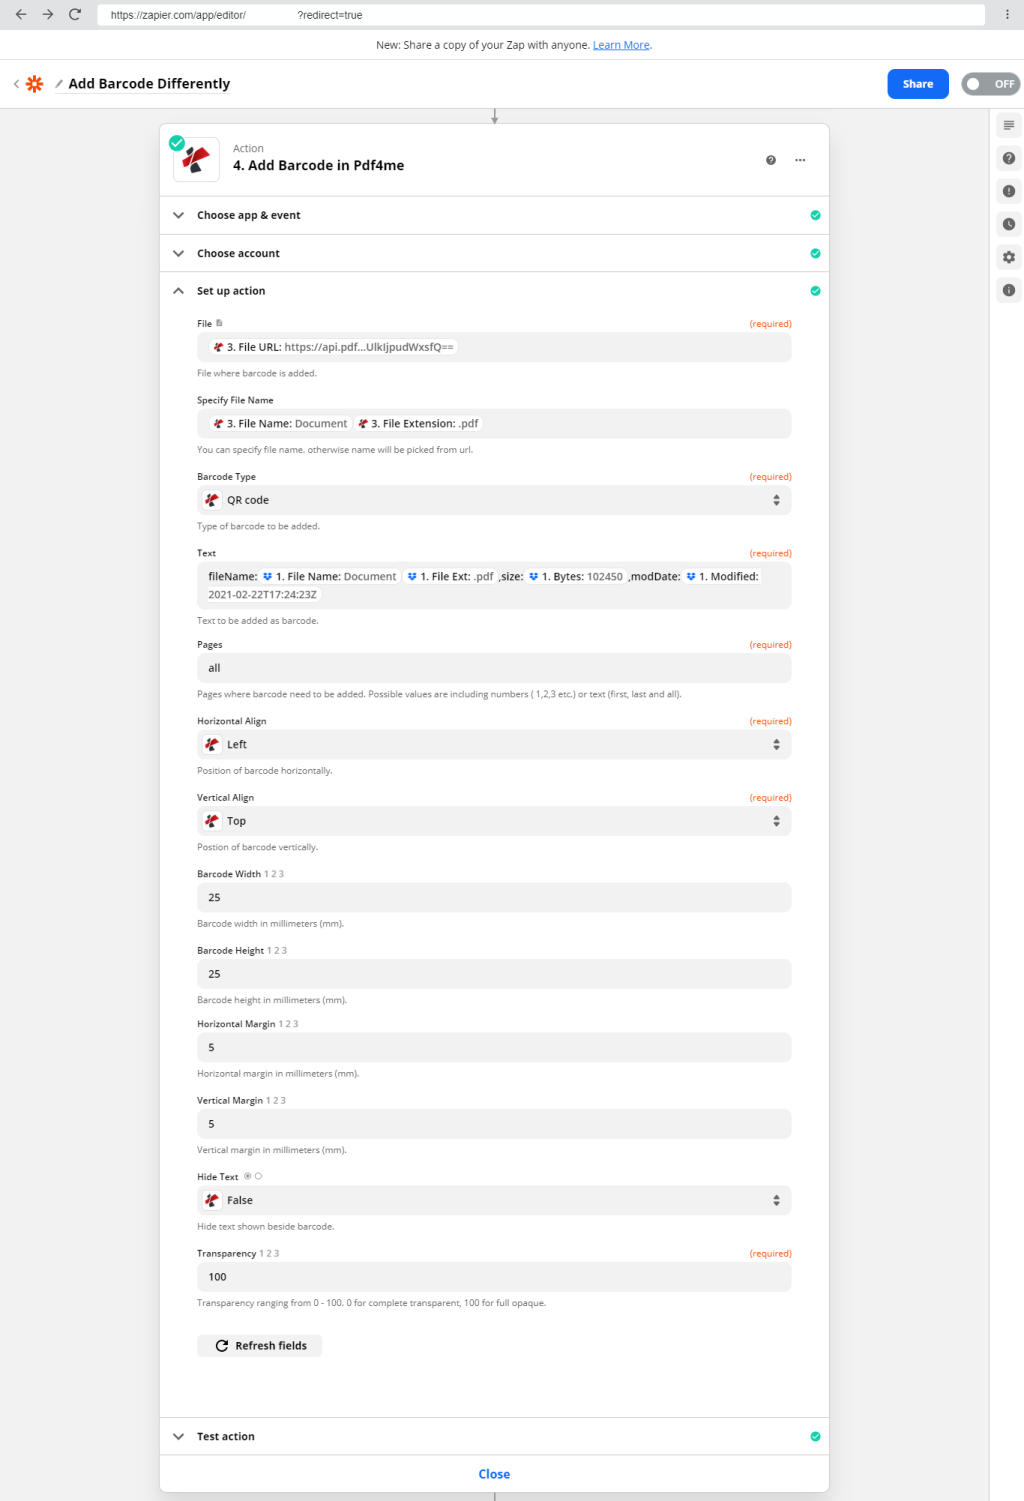
The second barcode we selected was a QR code. To add a barcode of type QR code, let us once again use the Pdf4me action in the zap. The output file from the first Pdf4me step is an input to the second step. In the case of QR code, let us configure the file metadata. After entering the metadata in the Text field of the second step, you select the Barcode Type as QR Code. Let us position it on the top left corner of all the pages with a small margin from the edges of pages. This way we can demarcate the barcodes in the document by appropriately positioning them without overlap.
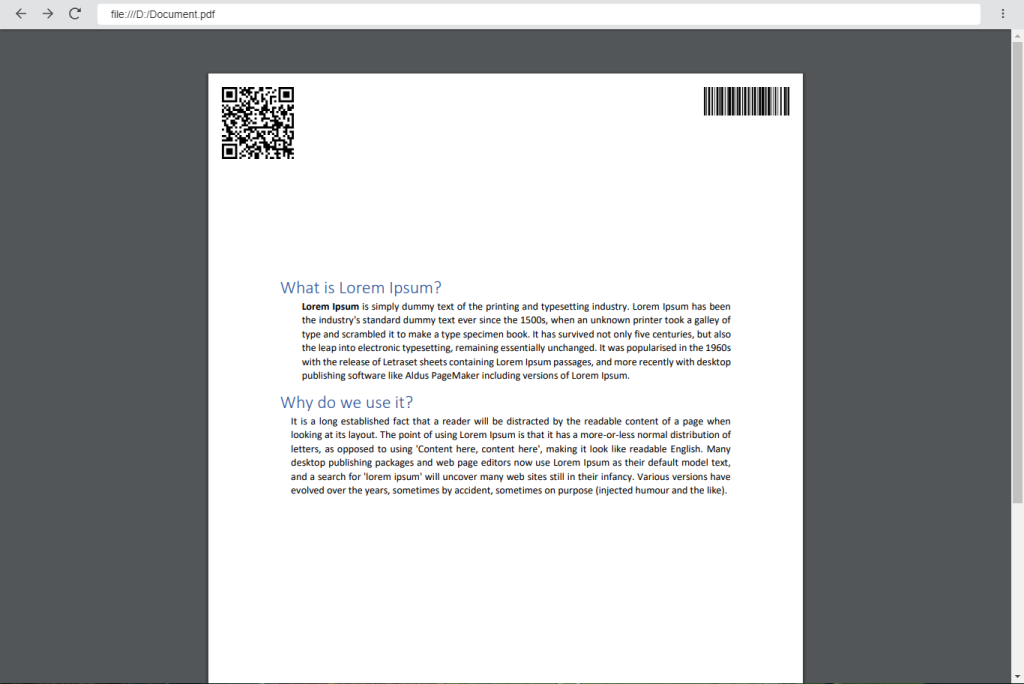
After adding both the barcodes, the document would look like this.
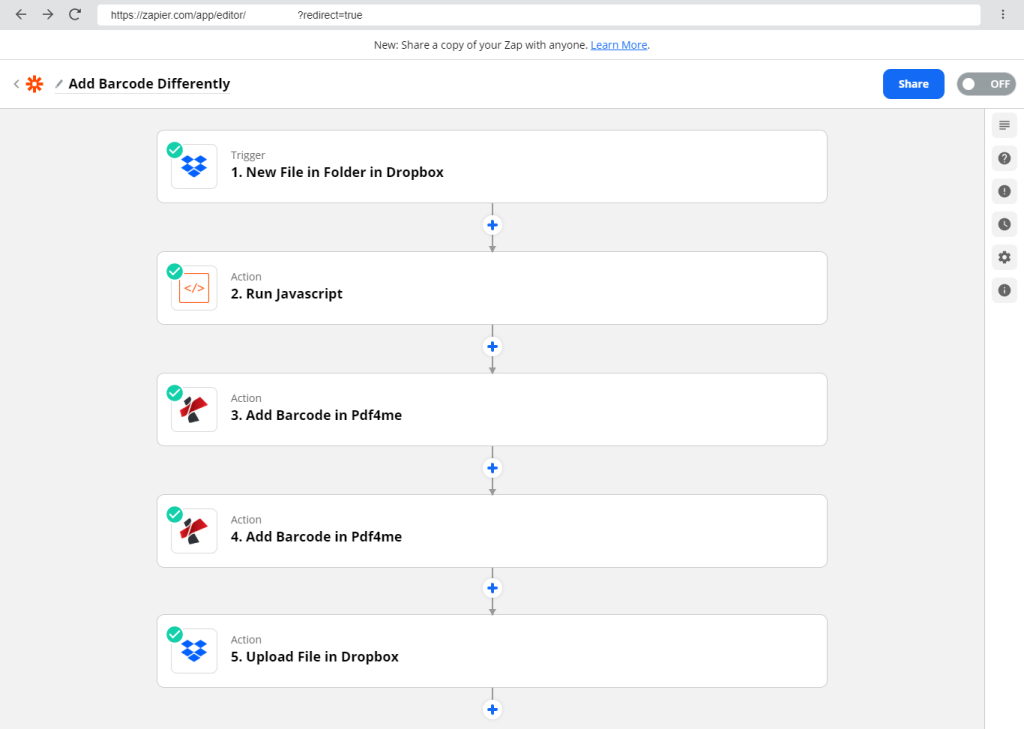
To summarize, the workflow to add and position barcodes would look like how it is as shown below.
Now that, you know how to add and position multiple barcodes in your document, here are a few tips that can help you add and place multiple barcodes without trouble in your document.
Tips while adding multiple barcodes in a document
- While positioning barcodes, we must place them in such a way that it would not be difficult for the scanner to decipher the barcode.
- The area containing the barcode must have no text, images, or any other irrelevant readable data, in its close vicinity.
- Avoid an ‘uphill battle’, should you need to add a stamp or a watermark, by adding barcodes as the last element in your document.
- Overlapping has to be avoided, along with providing adequate free and clear space surrounding the barcode, as it can give way to improper capture of the encrypted data.
You can see a few pictures of overlapping barcodes below.
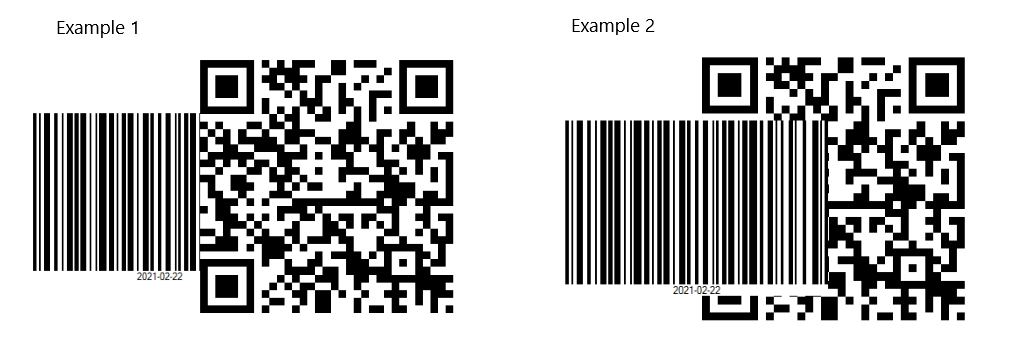
In Example 1 and 2 barcodes are overlapped and, in such cases, only one barcode overlaying is read.
On the other hand, if you try to scan the barcodes below, they will be readable because there is no overlap.

The area surrounding the barcode clear from irrelevant data is called a Quiet Zone. This zone helps in creating a border or a layer around it that helps the reading device identify the relevant area to be scanned from the barcode.
By now, you would have understood, how to add and position multiple barcodes in documents using PDF4me and Zapier. You may look up more of such features from the collections of automation features using PDF4me and Zapier. We have some great plans that fits your budget. Subscribe and experience more options with barcodes