
Create automations with PDF4me and Azure Logic Apps
Azure Logic Apps is a cloud-based service that enables you to organize and automate your workflows and business logic by integrating apps to transfer data across businesses or firms. Logic apps make it easy to integrate apps, communicate and transfer data via logic by creating robust and scalable solutions.
What are Power Automate and Azure Logic Apps?
Both these services are workflow-based that can automate your business process or system with easy integration with other Microsoft services or over 300 plus 3rd party connectors. These services require a small learning curve to get you started with creating workflows
Key differences with Power Automate
Microsoft Flow is a Software as a Service offering from Microsoft used to define the workflows using connectors and it doesn’t need an Azure subscription to start with. Though it is possible to define the workflow using Microsoft Flow for free, it has some limitations over Azure Logic Apps.
Microsoft Flow does not support any Enterprise connectors, no governance, and no Integration with Azure DevOps for CI/CD deployment.
In contrast, Azure Logic Apps exhibit support to a wide variety of services like activity log for Governance, Enterprise connectors, Integration with Visual Studio, and more.
Creating your first Logic Apps workflow
Let’s take a small use-case to see how we can achieve robust automation with PDF4me connectors and Azure Logic Apps. Say e.g., convert any office documents to PDF automatically when a file is uploaded to Drop Box storage.
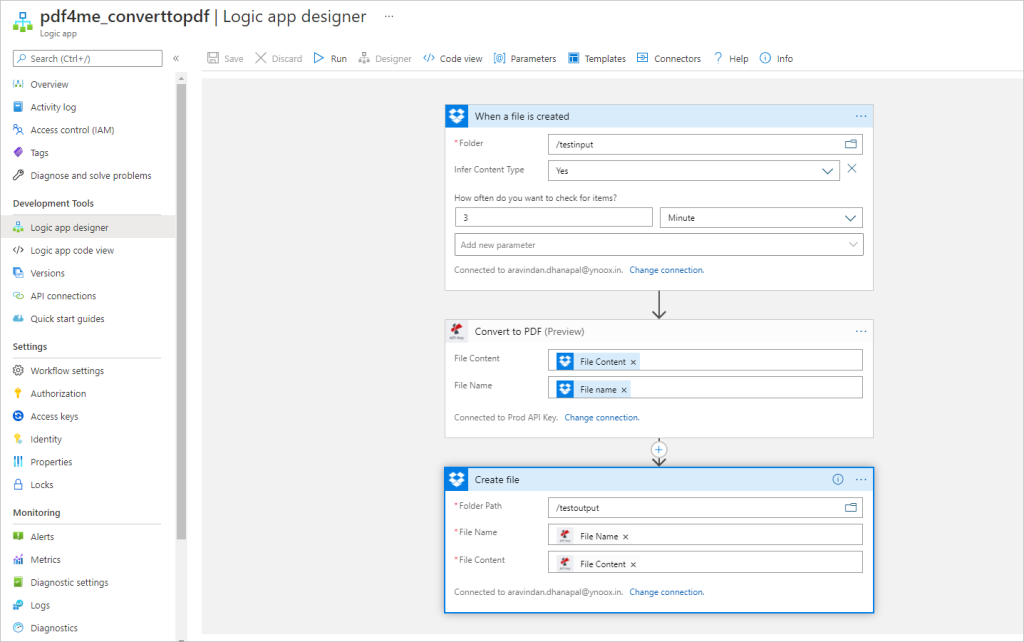
We’ll take a look at how to build your first workflow in Azure Logic Apps through the Azure portal.
Sign in to the Azure portal with your Azure account credentials.
In the Azure portal search box, search for logic apps, and select Logic Apps.
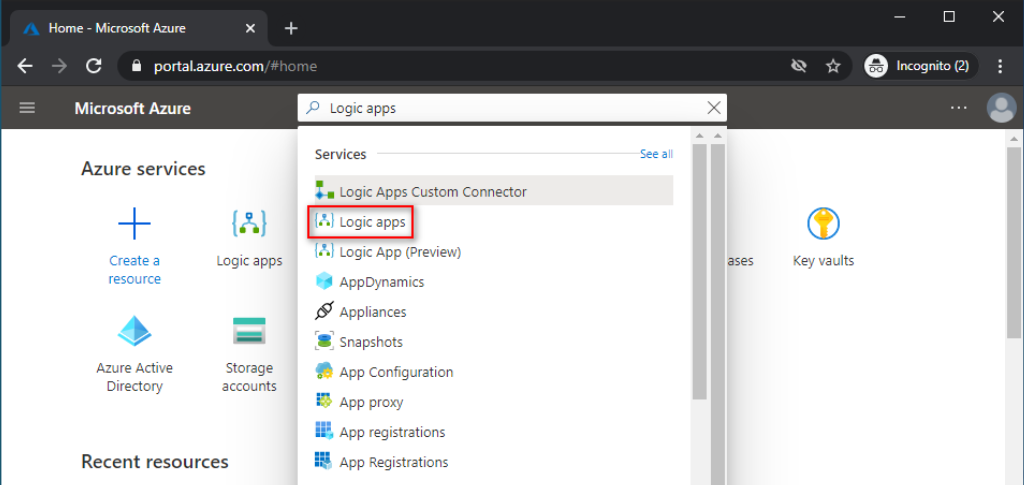
- On the Logic Apps page, select ‘Add’ to create your very own logic app.

- On the Logic App wizard, provide basic details and settings for your logic app like a name for your app, resource group, region, etc.
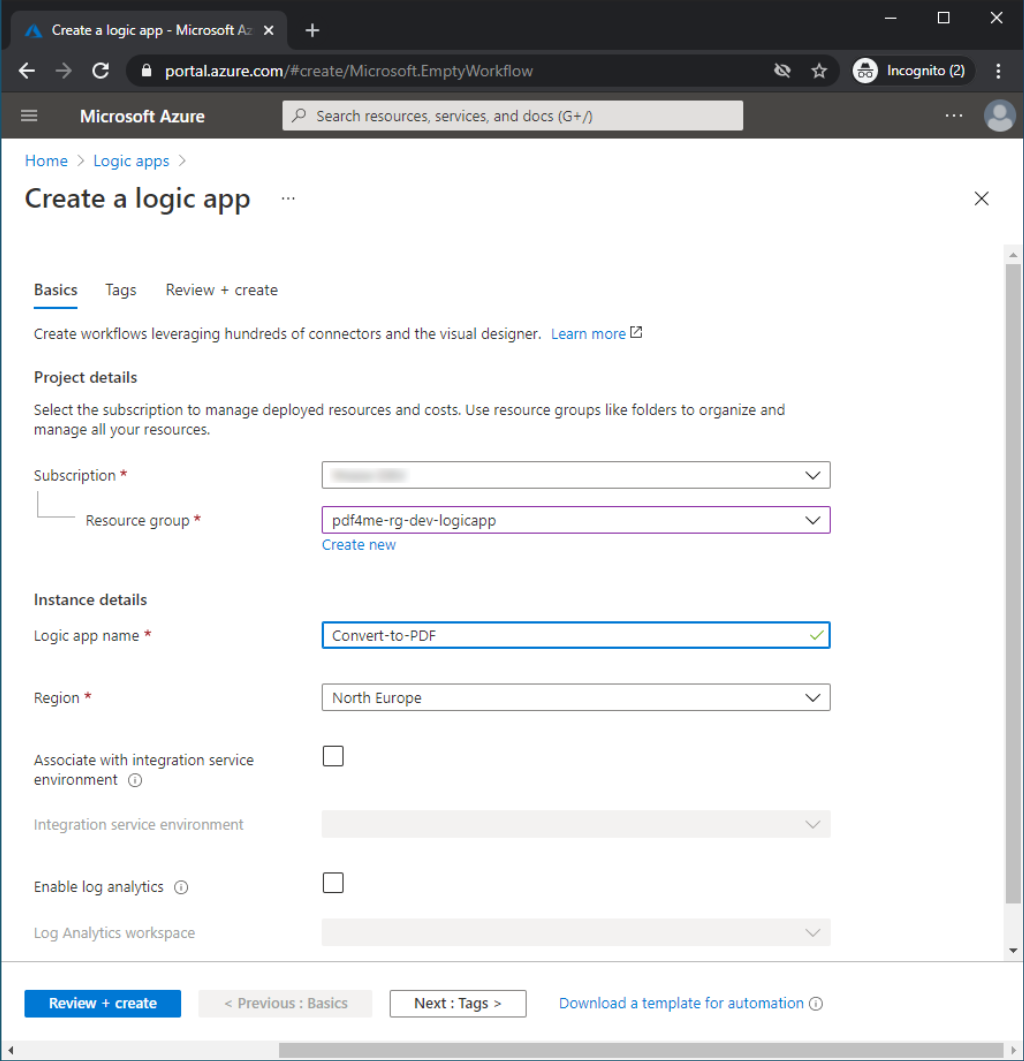
When you’re ready, select Review + Create. Confirm the details that you provided, and select ‘Create’.
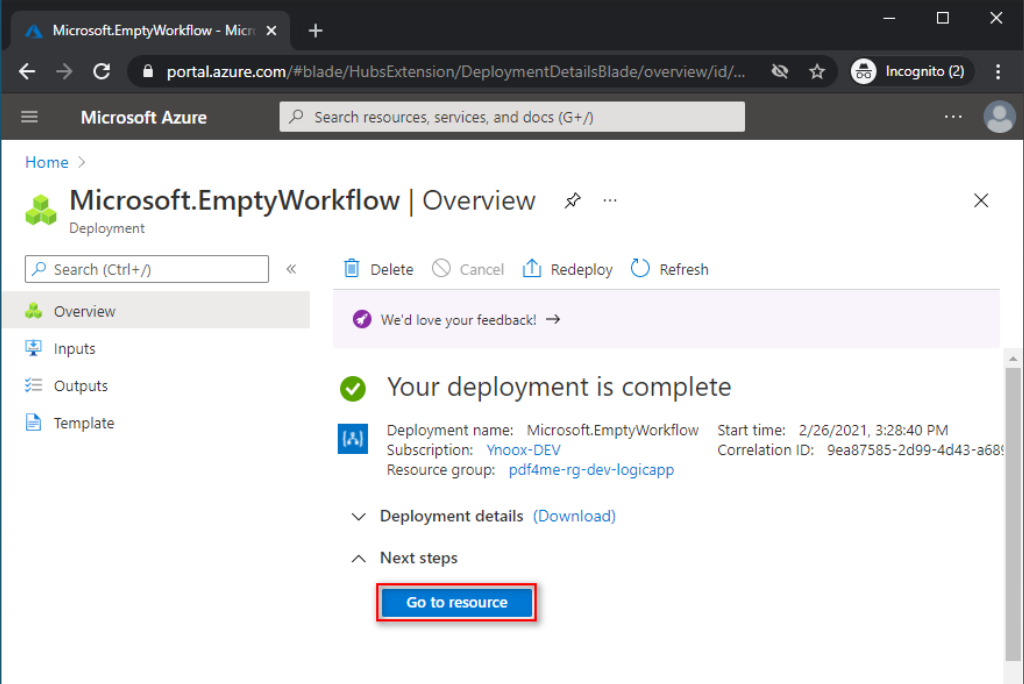
After Azure successfully deploys your app, select Go to resource. You can also find and select your logic app by using the search box and keying in your app name.
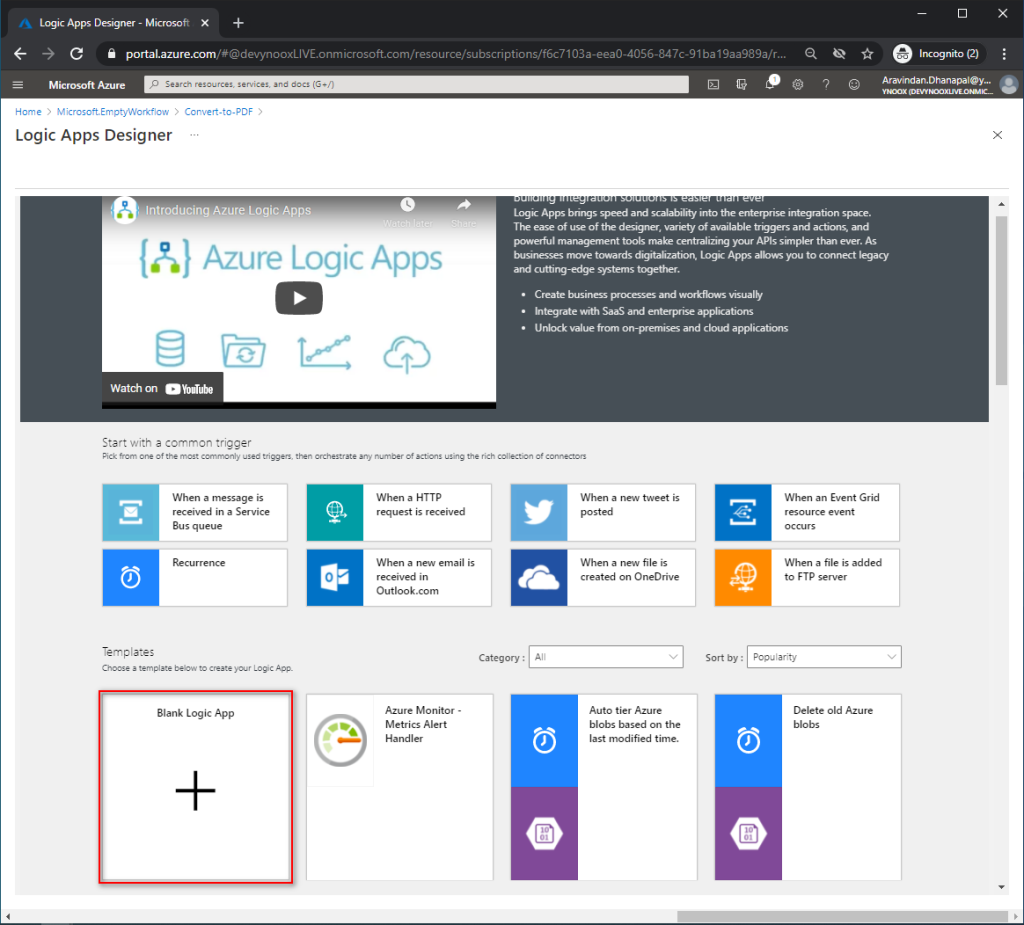
The Logic Apps Designer opens and shows a page with an introduction video and the commonly used triggers. From the Templates section, select the option Blank Logic App.
Creating a workflow with PDF4me Connect
To get started with using PDF4me Connect, you would require an account with PDF4me. If you are a developer looking at a lot of automation jobs, you can start a Developer Account with us and choose from some great plans. If you are an end-user looking at time-to-time smaller automation jobs, you could start with a Consumer Account.
Once you are ready with an account, let’s look at the steps further.
Trigger Execution
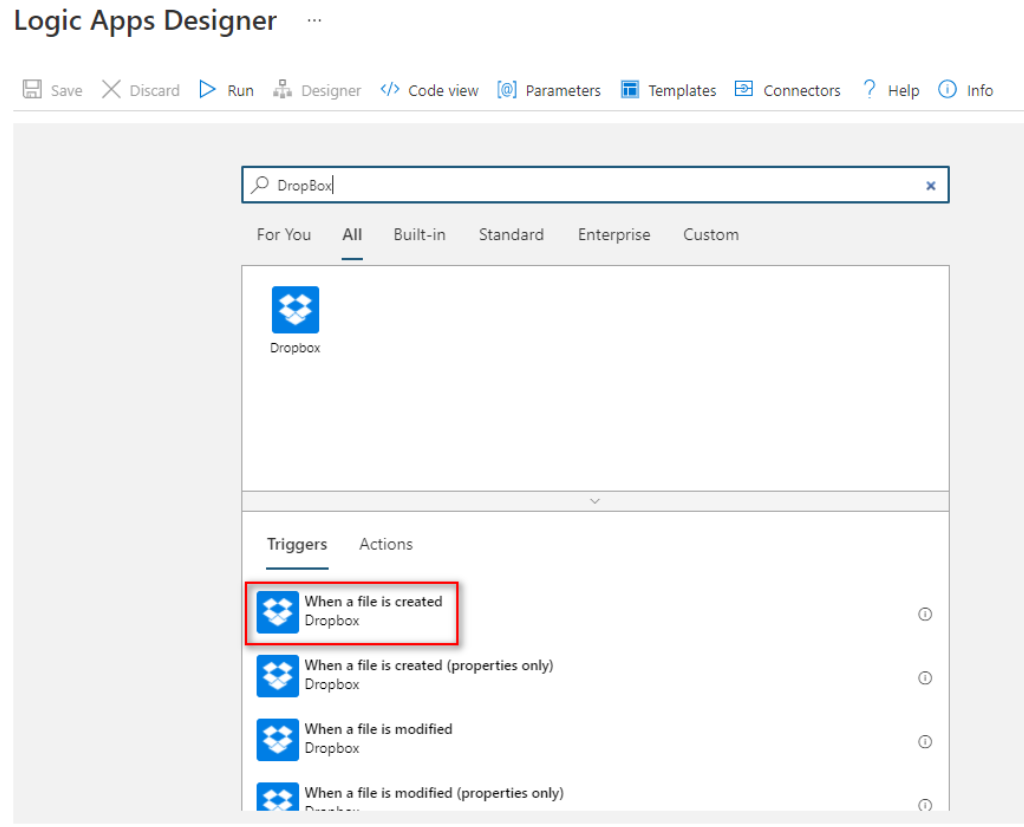
Logic Apps have multiple types of triggers to start your workflow. It can be scheduled to run on a regular interval or kick start with an HTTP request or it can be even triggered using the Apps custom trigger events. In our example, we trigger the workflow when a file is created in the Dropbox folder.
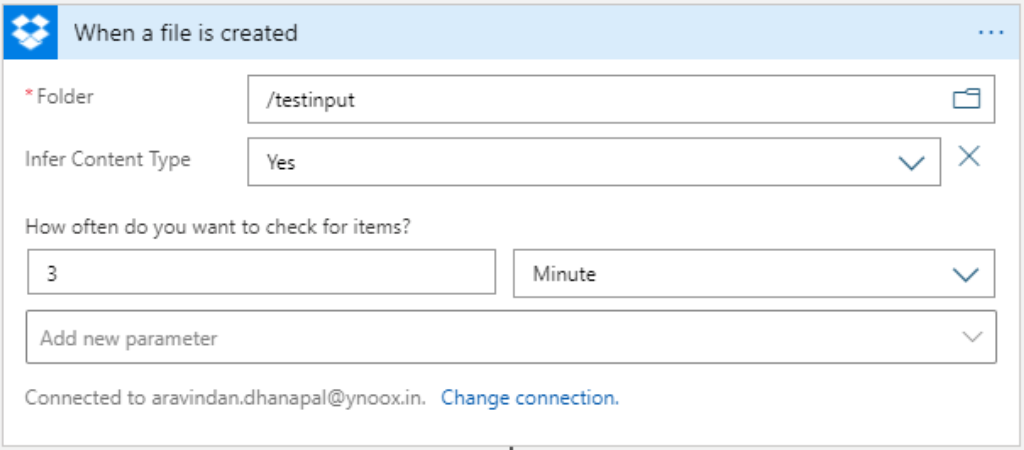
In the trigger configuration window, choose the source folder where you want to drop documents to convert.
Other parameters can be set based on the need of your logic.
Choose PDF4me Connect
Click on the New step after completing the Trigger part. A window prompt will appear with many app suggestions where you can search for PDF4me and select PDF4me Connect, as it’s the recommended and advanced connector from PDF4me.
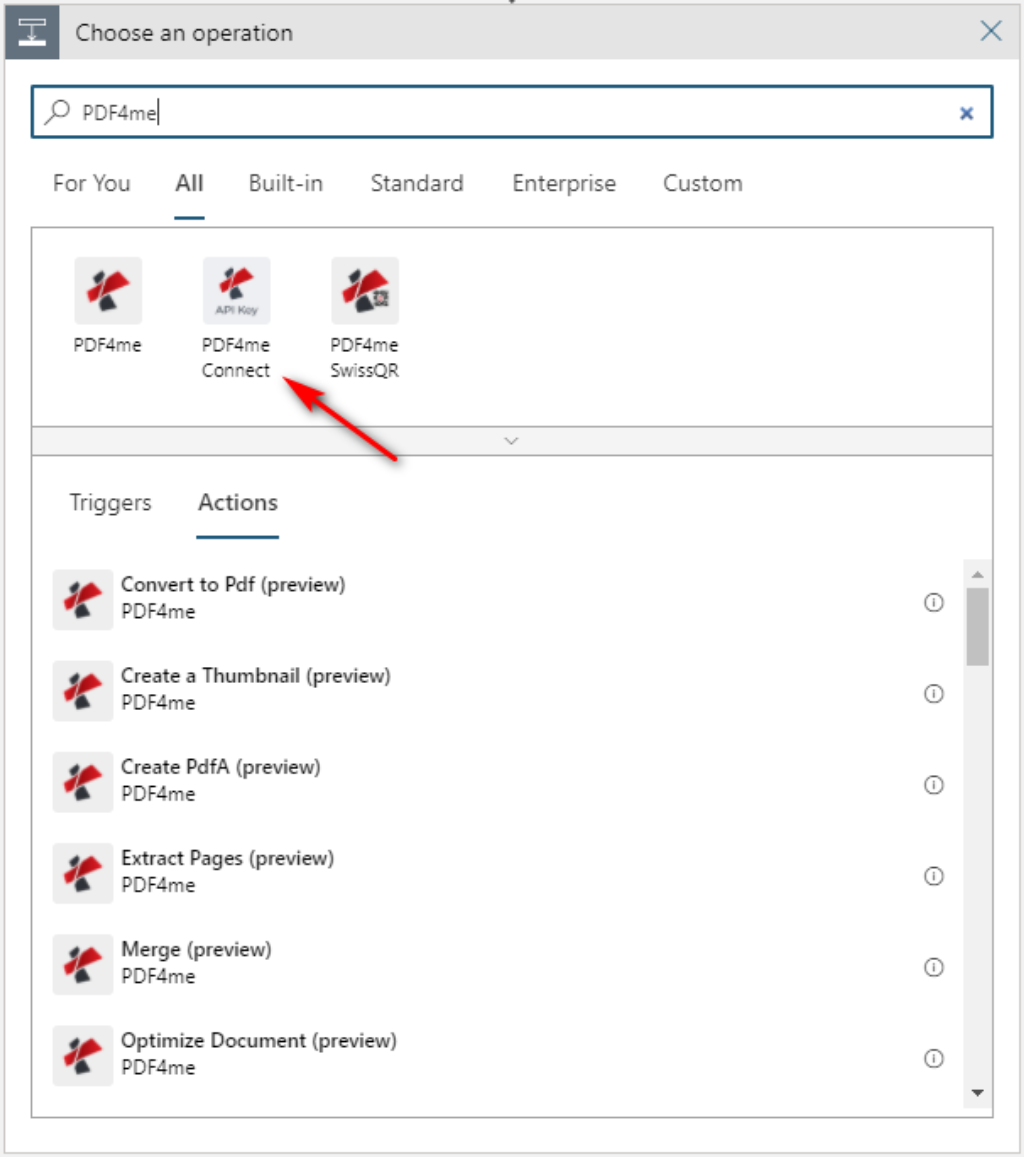
Choose Convert to PDF action
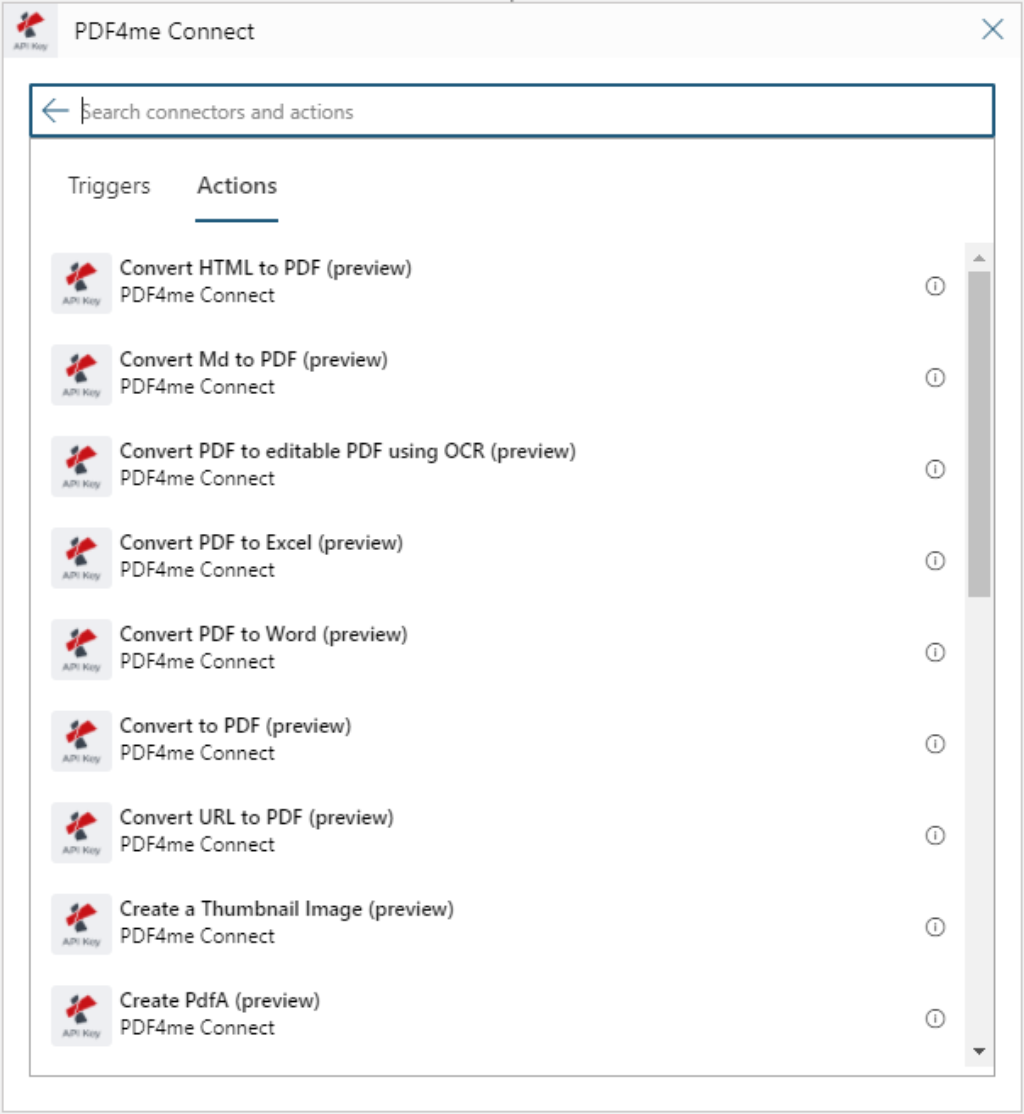
Once you’ve selected PDF4me Connect, there will be a list of actions that PDF4me provides to make it simple for you to set-up your PDF-related automation.
For our sample, you can select the Convert to PDF action from the list.
Map input fields with Convert to PDF action
You need to set the values for the selected action -
File Content – Input file content from the trigger action.
File Name – Input file name from the trigger action.

Save Converted PDF file to DropBox location
Now, as the final step, you need to save the converted output files to a preferred destination.
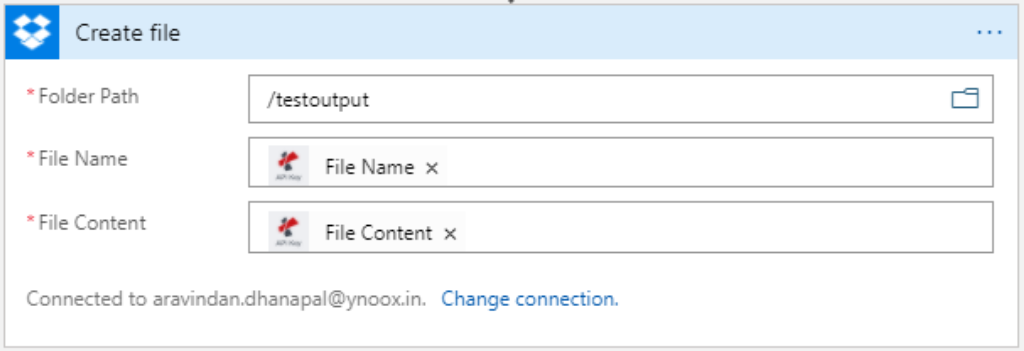
Like every other action, here also you need to configure a few parameters for storing your result files to your cloud storage.
Folder Path – Choose the folder where your converted PDF file needs to be saved.
File Name – Output file name for the PDF4me Convert action.
File Content – Output file content from the PDF4me Convert action.
Run your logic app
After creating your logic app, you can traverse the steps again to reconfirm that your workflow is configured correctly. You can test and wait for the Logic App to check your source folder based on the specified schedule. Or, you can manually run your Logic App by selecting Run(icon) on the Logic Apps Designer toolbar, as shown in the following screenshot.
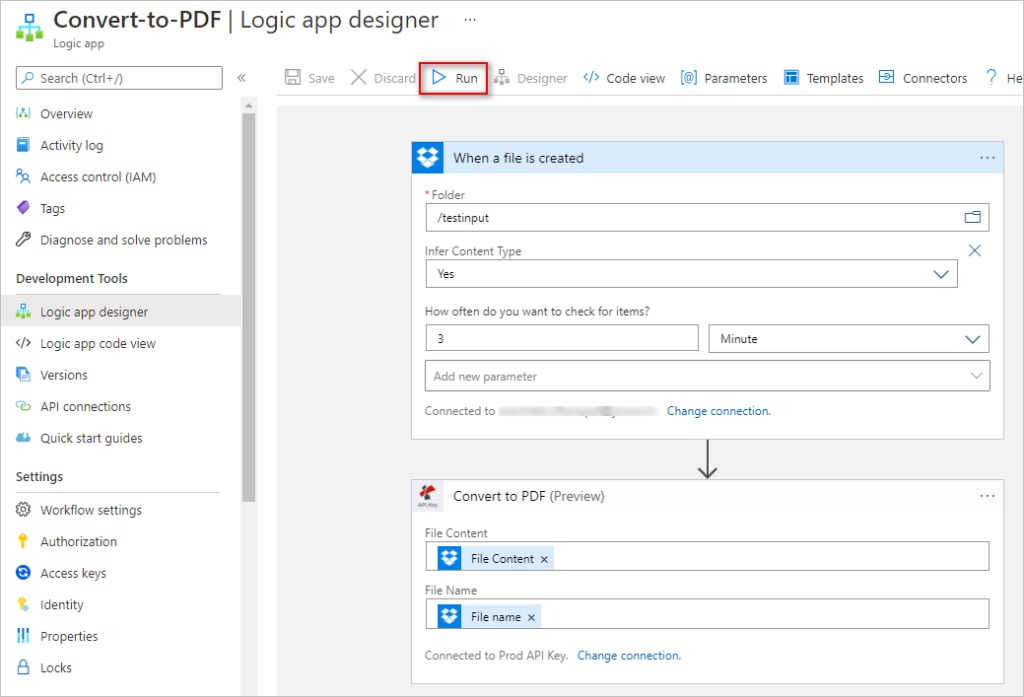
Done! Once your logic app has completed a Run with any test files you have added to the source folder, you will be able to find the result files in your destination directory in a few seconds. This confirms your logic is well built and working fine.
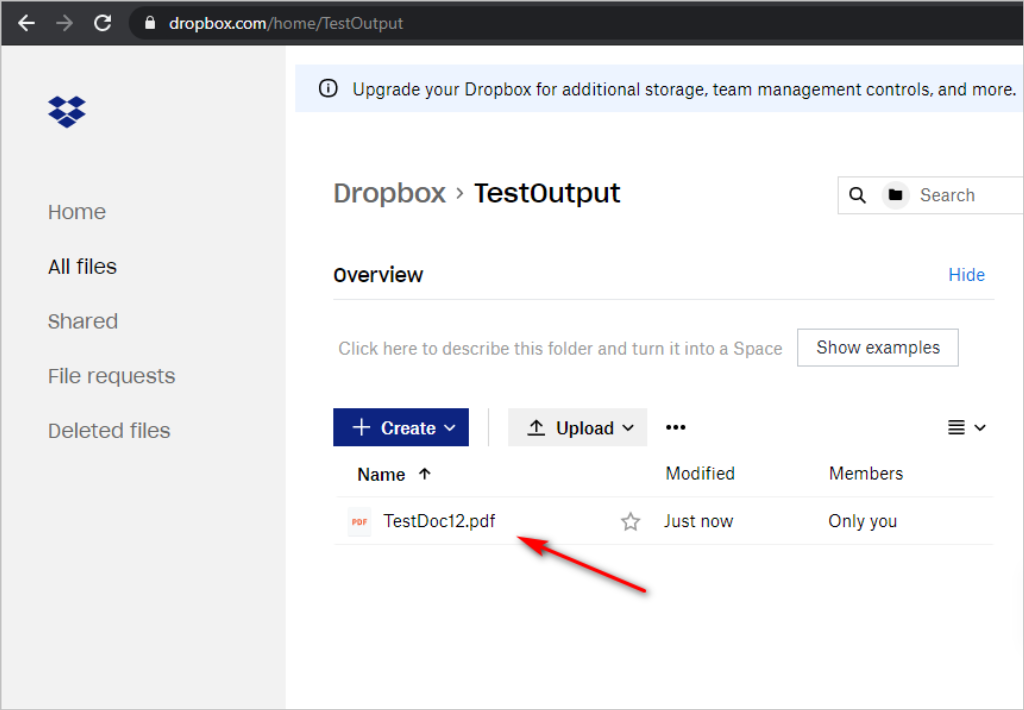
The following is a screenshot showing a converted PDF file stored in the DropBox folder location from the sample Logic App.
In this article, you created your first Logic App in the Azure portal with a PDF4me connector for converting office documents to PDF and save in your desired drop box location. Like, Convert to PDF, PDF4me connector provides many more actions which can be used effectively in your workflow automation that ease your daily routines.


